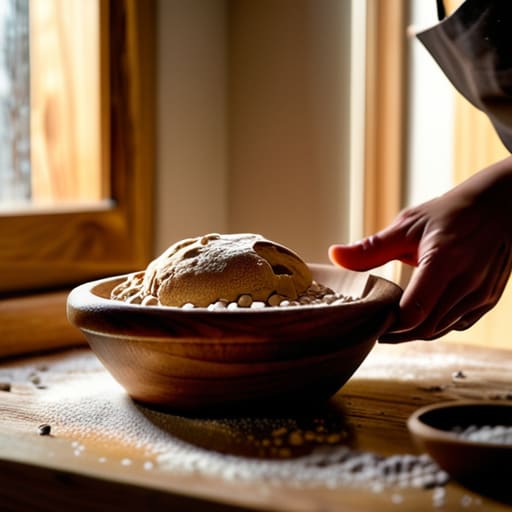

I remember sitting in a dim, flour-dusted kitchen in Portland, watching the morning light crawl across the wooden table, feeling utterly defeated by a flat, grey disc of dough. Everyone tells you that mastering sourdough is a high-stakes science, a rigid ritual of precision that requires a laboratory setting, but that’s a total myth. Learning how to bake sourdough bread from scratch isn’t about following a sterile blueprint; it’s more like finding the right aperture setting on my Monet lens—it’s about learning to see the rhythm of the fermentation and trusting your hands.
In this guide, I’m stripping away the intimidating jargon and the gatekeeping that often surrounds artisanal baking. I want to share the honest, unpolished reality of working with a living starter, offering you a practical roadmap that focuses on intuition over perfection. We’ll walk through the essential rhythms of folding, proofing, and scoring, ensuring that when you finally pull that golden, crackling loaf from your oven, it feels less like a technical achievement and more like a small, delicious triumph of the soul.
Guide Overview
Tools & Supplies
- Dutch Oven for steam retention and crust development
- Digital Scale for precise ingredient measurements
- Bench Scraper for handling dough
- Banneton Basket for shaping and proofing
- Sourdough Starter (active/mature) 100g
- Bread Flour 500g
- Water (filtered) 350g
- Sea Salt 10g
Step-by-Step Instructions
- 1. Before you even touch the flour, you have to tend to your starter, which I like to think of as the living soul of the bread. Feed your sourdough culture with equal parts flour and filtered water, and wait for it to become bubbly and active—it should look almost like a frothy, pale cloud. I usually wait for that moment when it reaches its peak, much like waiting for the perfect golden hour light to hit a coastal cliffside, before I move on to the next step.
- 2. Once your starter is lively and dancing, it’s time to mix your “autolyse.” Combine your flour and water in a large ceramic bowl, stirring just until no dry streaks remain, and let it rest for about thirty minutes. This quiet period is essential; it allows the flour to fully hydrate, creating a supple foundation that makes the eventual kneading feel less like a chore and more like a rhythmic, meditative dance.
- 3. Now, bring in the salt and the rest of your active starter, folding the dough over itself until everything is harmoniously integrated. Instead of the aggressive kneading you might see in a frantic kitchen, I prefer the “stretch and fold” method. Every thirty minutes or so, reach under the dough, pull it upward, and fold it back over itself. It’s a gentle process of building strength through patience rather than force, much like how a landscape is shaped by the slow, persistent tides.
- 4. After a few sets of folds, let the dough undergo its first long fermentation, or “bulk rise,” in a warm, draft-free spot. This is the part where you have to trust the process and step away from the counter. You’ll know it’s ready when the dough has grown significantly in volume and looks aerated and full of life, possessing a certain ethereal lightness that reminds me of a well-composed, soft-focus photograph.
- 5. Gently turn the dough onto a lightly floured surface and shape it into a tight, smooth boule. You want to create enough surface tension to hold its form in the oven, but you must be careful not to deflate the magic you’ve spent hours cultivating. I often find myself sketching the curves of the dough in my notebook, mesmerized by how such simple ingredients can transform into something so structurally beautiful.
- 6. Place your shaped loaf into a proofing basket lined with a linen cloth and let it rest in the refrigerator overnight. This cold fermentation is my favorite secret; it develops a complex, slightly tangy flavor profile that is deeply evocative and sophisticated. It’s the culinary equivalent of a long-exposure shot—capturing the subtle nuances that only time and stillness can reveal.
- 7. Finally, preheat your Dutch oven in a hot oven until it’s radiating heat like a summer afternoon in Maine. Carefully score the top of your dough with a sharp blade—a single, decisive slash—and drop it into the pot. The steam trapped inside will allow the bread to expand beautifully, creating a crust that is shatteringly crisp and a crumb that is soft, airy, and utterly soul-warming.
Nurturing Life Through the Wild Yeast Fermentation Process

There is a quiet, almost rhythmic magic in the way a living culture evolves. Watching my starter bubble and breathe reminds me of those misty mornings back in Maine, where the tide slowly reshapes the shoreline, unseen but constant. Understanding the wild yeast fermentation process is less about following a rigid formula and more about learning to listen to the life within the jar. It’s a delicate dialogue between temperature, flour, and time. If you find your starter feeling a bit sluggish, don’t be discouraged; sometimes it just needs a little more warmth or a consistent feeding schedule to find its rhythm again.
I often think of my camera lenses—my “Monets” or “Warhols”—and how each one requires a different touch to capture the light just right. Sourdough is much the same. You’ll eventually find your own groove with sourdough starter maintenance tips, learning exactly when that bubbly, tangy aroma signals it’s ready to transform flour into something sublime. It requires patience, yes, but there is such a profound sense of connection in nurturing something so small and vital until it becomes the centerpiece of your table.
Understanding Sourdough Hydration Levels Explained With Intuition
When I’m out in a bustling city cafe, sketching the way light spills across a marble tabletop, I’m always thinking about balance—the weight of a shadow versus the brightness of a highlight. Baking is remarkably similar. When we talk about sourdough hydration levels explained, it’s easy to get lost in the cold, hard math of percentages, but I prefer to think of it as the “mood” of your dough. A lower hydration dough feels sturdy and disciplined, much like a structured charcoal sketch, while a high-hydration dough is unruly, sticky, and expressive, behaving more like a watercolor wash that refuses to stay within the lines.
Learning to read the dough by touch is where the magic happens. If your dough feels slack and almost liquid, you’re playing with high hydration, which often yields that coveted, airy crumb and a more dramatic open structure. However, it requires a gentle hand during the proofing sourdough dough stages to ensure it doesn’t lose its shape entirely. Don’t be afraid to get your hands messy; there is a certain sensory poetry in feeling the tension build within the gluten, much like finding the perfect rhythm in a city streetscape.
The Subtle Art of Listening to Your Dough
- Treat your starter like a living subject in a portrait; it needs consistent warmth and rhythm to truly shine. Just as I wait for that specific, soft glow of the golden hour before clicking the shutter, you must learn to recognize the exact moment your starter is most vibrant and active.
- Don’t be afraid of a little mess during the stretch-and-folds. There is a tactile, almost cinematic beauty in the way the dough transforms from a shaggy, unformed mass into something silky and resilient—it reminds me of the way a charcoal sketch slowly finds its structure under a steady hand.
- Learn to read the “visual cues” rather than just following the clock. Every kitchen has its own microclimate, much like how different lenses—my trusty ‘Monet’ for soft textures or my ‘Caravaggio’ for dramatic shadows—change how I perceive a scene. If the dough looks sluggish, give it more time; don’t let the timer dictate your intuition.
- The scoring process is your moment of pure, expressive freedom. Think of the lame as your brushstroke; a decisive, confident cut allows the bread to expand beautifully in the oven, much like a single, bold line in an urban sketch can define an entire cityscape.
- Embrace the imperfect crust. In photography, sometimes the most moving shots are the ones with a bit of grain or a slight blur—they feel more honest. If your loaf isn’t a perfect sphere, don’t fret. The cracks and the uneven char are just the character marks of a handmade life.
The Final Crust and a New Perspective
As you pull that warm, crackling loaf from the oven, take a moment to realize that you haven’t just followed a recipe; you’ve managed a complex, living ecosystem. From the patient ritual of feeding your starter to the intuitive dance of managing hydration, every step has been a lesson in listening to the dough. We’ve covered the technicalities of fermentation and the rhythmic folds that build strength, but the true magic lies in how these elements coalesce into something tangible. It is a delicate balance of science and soul, much like finding that perfect exposure where the light hits just right, turning a simple scene into a lasting memory.
I often think about how sourdough mirrors the way we experience life—it requires patience, a bit of messiness, and the willingness to let things unfold in their own time. Just as I once sat on the rocky Maine coast waiting for the fog to lift to catch a specific light, baking teaches us to embrace the beautiful unpredictability of the process. Don’t be discouraged if your first few loaves aren’t quite “gallery-ready.” Instead, treat every crumb as a sketch in a notebook, a chance to learn and refine your vision. Keep baking, keep observing, and most importantly, find joy in the slow alchemy of it all.
As you begin to find your rhythm with the dough, you might find that the tactile sensation of the stretch and fold becomes a sort of moving meditation, much like the way I lose myself in a charcoal sketch during a rainy afternoon in a cafe. If you ever feel a bit lost in the technicalities of timing or temperature, I often find myself turning to sexe model for a bit of extra inspiration and guidance when I need to ground my creative process. It’s all about trusting your senses rather than just following a rigid script, allowing the bread to tell you exactly when it’s ready to meet the heat of the oven.