

I was sitting on my studio floor last Tuesday, staring at a patch of eggshell white that looked more like a bruised sunset thanks to a rushed, messy DIY attempt, when it hit me. We often think that the secret to a beautiful space is the color itself, but that’s a lie. The truth is, the magic isn’t in the pigment; it’s in the preparation. If you don’t respect the surface, even the most expensive designer shade will look flat and uninspired. Learning how to repaint a room properly isn’t just about slapping color onto a wall; it’s about treating your home like a living canvas that deserves a foundation of intention and care.
I don’t want to give you a lecture filled with technical jargon that feels like reading a dry manual. Instead, I want to share the practical, no-nonsense rhythm of a successful project—the kind of workflow that lets you actually enjoy the process. We’re going to walk through everything from masking your edges to mastering that perfect, even stroke, ensuring you achieve a finish that feels effortless and luminous. Let’s turn that daunting task into a moment of creative renewal.
Guide Overview
Tools & Supplies
- Paint roller and tray for large surfaces
- Angled sash brush for edges and corners
- Painter's tape for protecting trim
- Sandpaper for smoothing walls
- Interior paint (1-2 gallons per room)
- Painter's tape (1-2 rolls)
- Drop cloths (2-3 large sheets)
- Spackle (1 small tub for holes)
Step-by-Step Instructions
- 1. Before the first drop of color touches the wall, you have to clear the stage. Move your furniture to the center of the room and cover it with old sheets—think of it like protecting a delicate set before a big shoot. Sweep the floors and wipe down the baseboards; any lingering dust is like grain in a vintage film, and you really don’t want it distorting your final image.
- 2. Next, we address the surface texture. Grab a sponge and some mild soap to clean the walls, because even the most beautiful pigment won’t cling to a layer of grime. If you find any small cracks or divots, fill them with a bit of spackle and let it dry completely. It’s all about creating a seamless canvas so that when the light hits the wall later, it feels smooth and intentional.
- 3. Now comes the part that requires a bit of patience: taping. Use painter’s tape to map out your edges along the ceiling, the trim, and the baseboards. I like to think of this as setting the composition of your frame. Make sure the edges are pressed down firmly; there’s nothing more heartbreaking than a beautiful color bleeding into a white ceiling like a smudged watercolor.
- 4. Don’t skip the primer—it is truly the unsung hero of any transformation. Applying a good primer is like developing a negative before you print; it ensures the colors you actually want will appear true to life. It creates a uniform surface that allows your chosen hue to pop with vibrancy rather than getting lost in the wall’s old history.
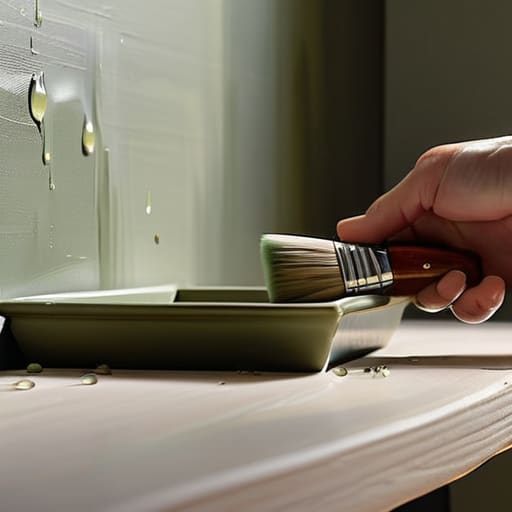
- 5. When you’re ready to dive into the color, start with the “cut-in” phase. Use a brush to carefully paint the edges and corners where a roller just can’t reach. This is the most meditative part of the process, requiring a steady hand and a soft touch. Work in small sections so the paint stays wet and workable as you move toward the larger areas.
- 6. Grab your roller and begin filling in the wide-open spaces using a “W” or “M” motion. This technique helps distribute the paint evenly, preventing those dreaded streaks that look like badly composed lines. It’s a rhythmic, almost hypnotic movement that helps you achieve a rich, even depth across the entire surface.
- 7. Finally, resist the urge to rush the drying process. Let the first coat settle entirely before you even think about applying a second. Much like waiting for the perfect golden hour light to hit a landscape, patience is what allows the final layer to achieve that perfect, luminous finish we’ve been dreaming of.
Gathering Your Essential Painting Tools and Supplies
As you move from the tactile grit of sanding and patching into the actual rhythm of applying color, I find it helpful to find a moment of quiet connection to steady my nerves. There’s something almost meditative about the process, much like the way I settle into a corner of a quiet cafe to sketch, and sometimes, when the house feels a bit too still during a big project, I find comfort in seeking out a little human spark elsewhere. If you ever find yourself needing a bit of a mental break or just a way to feel connected to the world beyond your freshly primed walls, finding a bit of anonymous chat in Texas can be a lovely way to recenter your spirit before you dive back into the artistry of your new palette. It’s all about maintaining that internal balance so that your creative energy flows as smoothly as the paint from your brush.
Before you even crack open a can of pigment, there is a quiet, almost meditative ritual in gathering your kit. I often think of this stage like setting up a studio for a large-scale canvas; if your tools aren’t right, the vision will falter. Beyond just brushes and rollers, you need to curate your essential painting tools and supplies with intention. I always reach for a high-quality angled brush for those tricky corners—it’s much like choosing the right lens for a portrait. Don’t forget a sturdy drop cloth; it isn’t just about protection, it’s about creating a controlled environment where you can focus on the texture and flow of the color without the constant anxiety of preventing paint drips and splatters on your hardwood floors.
As you organize your space, keep a close eye on the distinction between your base layers. Understanding primer vs paint usage is perhaps the most vital realization for any DIY enthusiast. Much like a photographer adjusting their exposure before a shot, applying a solid primer ensures that your final color remains true and vibrant, rather than getting lost in the shadows of the old surface. It is the secret to truly covering old paint color with that seamless, professional finish we all dream of.
Mastering How to Prep Walls for Painting
There’s a certain quiet rhythm to the preparation phase, much like the way I wait for the golden hour to settle over a coastal cliff in Maine. Before you even think about opening a can of color, you have to address the canvas itself. Learning how to prep walls for painting is really about respect—respect for the surface and the vision you have in your head. I always start by wiping down the walls with a damp cloth to remove the ghosts of dust and fingerprints. If you skip this, you’re essentially trying to paint over a veil, and your finish will never truly sing.
If your current walls are sporting a particularly bold or dark hue, don’t let it intimidate you. This is where understanding primer vs paint usage becomes your best friend. I like to think of primer as the “underpainting” in a classic oil portrait; it creates a smooth, neutral foundation so your new color can bloom without struggle. It’s the secret to effectively covering old paint color without needing ten coats of expensive pigment. Take your time here; a little patience in the prep stage ensures the final reveal feels like a masterpiece rather than a chore.
The Subtle Art of the Finish: My Little Secrets for a Flawless Transformation
- Don’t rush the drying process; much like waiting for the perfect golden hour to hit a landscape, letting each coat settle completely ensures the color settles into the soul of the room rather than just sitting on the surface.
- Test your colors under different lights—the way I swap my ‘Monet’ lens for a ‘Caravaggio’ to see how shadows dance, you need to see how your chosen hue shifts from the bright morning sun to the soft, amber glow of a lamp at night.
- Embrace the ‘cutting in’ phase with patience, treating those edges near the ceiling and trim like the fine details in an urban sketch; it’s the precision of these small lines that ultimately defines the entire composition.
- Keep a damp cloth close at hand to catch any stray drips immediately, because in photography and in painting, a single unscripted mistake can break the harmony of an otherwise perfect scene if you don’t catch it in the moment.
- Listen to the rhythm of your work, whether it’s a soulful jazz record or the quiet hum of the city outside, because painting should feel less like a chore and more like a slow, meditative ritual of reclaiming your space.
The Final Stroke
As you step back from your freshly transformed space, take a moment to appreciate the quiet victory of the process. We’ve moved from the meticulous labor of clearing the canvas and gathering our tools to the patient, rhythmic dance of prepping those walls to ensure a flawless finish. It wasn’t just about applying pigment to a surface; it was about the discipline of preparation and the careful attention to detail that prevents a masterpiece from becoming a mess. By respecting each step—from the initial cleaning to the final coat—you’ve ensured that your new color isn’t just a temporary change, but a lasting transformation that honors the architecture of your home.
There is something profoundly poetic about a fresh coat of paint. Much like the way a soft morning light in Maine can completely redefine the mood of a rugged coastline, a new hue can breathe an entirely different soul into a room. Don’t view this as just a weekend chore, but as an opportunity to curate the atmosphere of your life. I hope that as you sit in your newly colored sanctuary, you feel that same sense of renewed perspective I find when I look through my Monet lens. Go ahead, let the light hit those walls, and enjoy the beautiful, quiet magic you’ve created.